Hydraulic lift failure can turn a routine lifting task into a serious safety concern. The platform may rise slowly, stop halfway, drift downward, or refuse to move. These symptoms often point to problems with hydraulic pressure, fluid condition, valves, seals, hoses, or electrical controls. A small leak beneath the cylinder can leave an oily patch on the floor, while trapped air may make the lift feel spongy and unstable.
Understanding how to troubleshoot a hydraulic lift failure requires careful observation, not guesswork. Experienced technicians check the lift’s load, fluid level, visible leaks, pump noise, and control response before replacing parts. A pressure reading alone can mislead. The first diagnosis is not always right. A weak pump may be blamed when a clogged suction filter actually restricts flow. Likewise, a faulty switch may hide a deeper mechanical problem.
Safety must guide every inspection. Lower the lift completely when possible, isolate the power source, and follow the manufacturer’s service instructions. Never work beneath an unsupported platform or rely on hydraulic pressure alone. Qualified personnel should inspect high-pressure components and structural parts. This guide explains how to troubleshoot a hydraulic lift failure through practical checks, likely causes, and repair decisions. It also highlights warning signs that require professional service instead of continued operation. Some failures appear simple. They may not be. Careful testing, accurate records, and honest reassessment help prevent unnecessary repairs and dangerous assumptions.
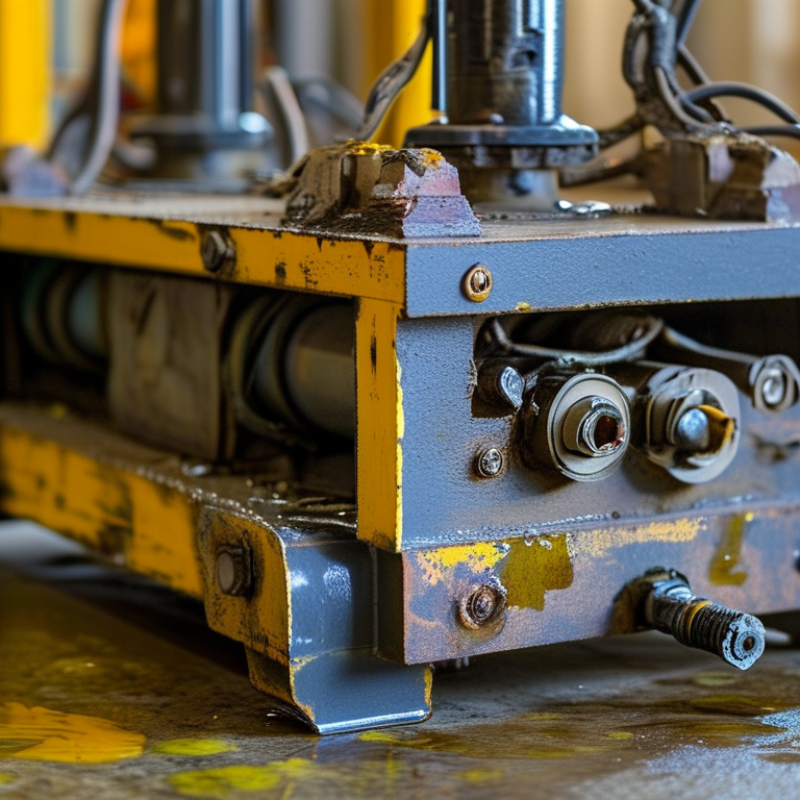
Hydraulic lift failure means a lift cannot raise, hold, or lower a load as designed. It is not always a pump fault. A worn seal may allow fluid to bypass the piston, causing slow lifting or gradual descent. Air trapped in the circuit can create jerky movement and a spongy response. Low fluid, contaminated fluid, or a blocked filter can also reduce pressure. Sometimes, the cause is simpler: an overloaded or uneven platform.
Keep people away from the lift during inspection. Never work beneath an unsupported platform. Isolate the power source, then check hoses, fittings, and the reservoir for visible leaks. Confirm the fluid level against the equipment manual. Do not guess. Pressure testing requires a properly rated gauge and trained personnel.
If pressure remains normal but the platform drifts, suspect cylinder seals or valve leakage. If pressure is low, inspect the pump inlet, relief valve, and filter.
Field diagnosis is rarely perfect on the first attempt. A clean-looking fluid sample may still hide fine particles that damage valves. That detail is easy to miss. Listen for unusual pump noise, but do not treat noise alone as proof of failure. Record lifting speed, load weight, fluid condition, and pressure readings. These details help separate mechanical wear from operating errors. When symptoms remain unclear, stop using the lift and request a qualified hydraulic inspection.
Hydraulic lift failure often announces itself before the platform stops moving. Watch for slow raising, uneven travel, sudden lowering, or a pump that sounds strained. A warm, sharp-smelling reservoir may indicate fluid breakdown. Wet fittings, cracked hoses, and oil beneath the cylinder suggest leakage. A drifting platform is especially serious. It may point to a damaged check valve, worn seals, or internal cylinder bypass.
The U.S. Bureau of Labor Statistics recorded 865 fatal workplace falls, slips, and trips in 2022. That figure covers all industries, not hydraulic lifts, but it shows why uncontrolled movement deserves immediate attention. During inspection, place the lift out of service, lower it safely, and check fluid level, hose condition, pressure readings, and visible seal damage. Never rely on the hydraulic circuit alone for support. Use the manufacturer’s approved mechanical locks and follow applicable ANSI/ALI and OSHA procedures.
Contamination is easy to underestimate. ISO 4406 cleanliness codes remind technicians that tiny particles can damage valves and pumps long before failure becomes obvious. A cloudy sample, metal particles, or repeated filter blockage needs laboratory testing, not guesswork. I have seen maintenance teams replace a pump when a loose suction fitting caused the real problem. That mistake is expensive. Pressure tests can also mislead when gauges are inaccurate or installed at the wrong point. Record symptoms, temperatures, load conditions, and recent repairs before changing parts. The first diagnosis is not always right.
Hydraulic lift failure often appears as slow rising, uneven movement, or sudden loss of holding pressure. Inspection should begin with safety, not guesswork. Remove the load, lower the platform if possible, and isolate electrical and hydraulic energy. Use approved supports before entering any danger zone. Never rely on the cylinder alone. Record the symptom, sound, temperature, and platform position. These details can reveal whether the fault is mechanical or hydraulic.
Check the reservoir level and fluid condition through a clean sample. Milky fluid may indicate water. Dark fluid or a burnt smell suggests overheating. Inspect fittings, hoses, the cylinder rod, and the floor beneath the lift. A dry surface does not prove the system is sound. Wipe suspected areas, cycle the lift under a safe light load, and inspect again. Compare gauge pressure with the specified range. Low pressure may come from a worn pump, relief valve, blocked filter, or low engine speed. Do not adjust the relief valve casually.
If pressure is normal but the platform drifts, inspect the control valve and cylinder seals for internal leakage. Listen for pump cavitation, especially a sharp rattling noise. Check suction lines for loose clamps or restricted strainers. Air in the circuit can cause jerky motion; bleeding must follow the service manual. I have seen technicians replace pumps before checking a loose return hose. That mistake wastes time. Stop testing when heat rises quickly, a hose bulges, or a structural part bends. A qualified technician should perform pressure and leakage tests with calibrated instruments.
The pressure should increase smoothly as the lift raises and remain stable while holding the load. A slow pressure drop during the holding phase may indicate internal cylinder leakage, a leaking control valve, trapped air, or a weak pump. Always compare readings with the equipment manufacturer's specified operating range.
What Is Hydraulic Lift Failure and How to Troubleshoot It?
A hydraulic lift may stop rising, drift downward, move slowly, or make a sharp whining sound. Begin with visible evidence: check the oil level, leaks, damaged hoses, loose fittings, and unusual cylinder marks. Use a calibrated pressure gauge to compare readings with the service specification. Low pressure often points to a worn pump, blocked filter, relief-valve fault, or trapped air. However, a weak motor can imitate pump failure. I have seen technicians replace pumps too early.
Safety comes before diagnosis. OSHA’s Control of Hazardous Energy guidance states that lockout/tagout can prevent about 120 deaths and 50,000 injuries each year. Isolate electrical and hydraulic energy, lower the platform, install mechanical supports, and release stored pressure. Never inspect a pressurized leak with bare hands. ISO 4413 also requires hydraulic systems to be designed and maintained against unexpected movement and pressure release. Repair damaged hoses, clean contaminated oil, and replace seals with compatible parts. Then test the lift without passengers.
Tips: Record pressure, oil temperature, load, and movement time. Small details matter. A cold lift may perform normally, while hot oil exposes internal leakage. Check cylinder drift with the load removed, then repeat under a controlled load. If drift remains, test the control valve and cylinder separately. Do not trust sound alone; cavitation and air often sound similar. My own troubleshooting notes sometimes miss temperature changes, so every inspection should include time, temperature, and pressure readings.
| Observed Problem | Likely Hydraulic or Mechanical Cause | Recommended Checks | Typical Corrective Action | Safety Priority |
|---|---|---|---|---|
| The lift will not rise | Low fluid level, blocked suction strainer, worn pump, incorrect valve position, or an electrical control fault. | Confirm the emergency stop is released, check the fluid level, inspect the suction line, listen for pump operation, and verify that the control valve receives the correct signal. | Restore the fluid to the specified level, clean the strainer, repair the control circuit, or service the pump after isolating stored hydraulic and electrical energy. | High |
| The lift rises slowly | Restricted filter, low engine or motor speed, contaminated fluid, excessive internal leakage, or an overloaded platform. | Compare actual load with rated capacity, inspect filters, check motor or engine speed, measure system pressure, and observe whether the pump sounds noisy or strained. | Remove excess load, replace a clogged filter, use clean fluid of the specified grade, adjust the drive system, or rebuild components that show excessive leakage. | Medium |
| The lift lowers too quickly | Faulty lowering valve, incorrect flow-control adjustment, damaged counterbalance valve, or a failed hose-burst protection device. | Keep personnel clear, inspect the lowering circuit for damage, check valve settings against the service specification, and look for external leakage or damaged fittings. | Stop operation immediately, replace damaged safety-critical valves or hoses, and have the lowering speed tested before returning the lift to service. | High |
| The lift drifts downward while stopped | Cylinder seal leakage, leaking control valve, loose fitting, damaged hose, or thermal expansion and contraction of trapped fluid. | Lower the platform to a safe position, inspect for visible leaks, isolate the cylinder where permitted, and monitor drift without placing anyone beneath the raised load. | Replace defective seals, valves, hoses, or fittings; then perform a controlled load-holding test according to the equipment service procedure. | High |
| The pump is noisy or vibrates | Air entering the suction line, low fluid level, cavitation, contaminated fluid, misalignment, or a worn pump. | Inspect the suction hose and fittings for air leaks, verify fluid level, check the reservoir for foaming, examine the inlet strainer, and listen for changes under load. | Seal suction-side connections, correct the fluid level, remove contamination, clean the inlet path, and repair or replace the pump if wear is confirmed. | Medium |
| The hydraulic fluid overheats | Continuous operation at high pressure, undersized or blocked cooler, excessive internal leakage, low fluid level, or incorrect fluid viscosity. | Measure operating temperature, inspect the cooler and airflow, check relief-valve settings, look for pressure spikes, and examine fluid condition and viscosity. | Remove restrictions, improve cooling, correct the relief setting, reduce unnecessary deadheading, repair internal leakage, and replace degraded fluid using the specified procedure. | Medium |
| Hydraulic fluid is leaking | Loose connection, damaged hose, worn seal, cracked tube, excessive pressure, or incorrect installation of a fitting. | Shut down and depressurize the system, identify the leak using approved methods, inspect hoses and fittings, and never use hands to search for a pressurized leak. | Replace damaged hoses and seals, tighten or correctly install fittings, clean the area, and test for leaks at operating pressure after reassembly. | High |
| The lift stops or surges during movement | Air in the hydraulic circuit, sticking valve spool, contaminated fluid, uneven mechanical loading, or intermittent electrical control. | Check fluid condition, inspect electrical connections, verify load distribution, observe valve operation, and bleed air only by following the equipment procedure. | Remove air, clean or replace contaminated components, correct the load, repair electrical connections, and inspect the valve for sticking or wear. | High |
| The lift reaches the top but does not hold pressure | Relief valve set too low, leaking cylinder piston seal, bypassing directional valve, or excessive internal component wear. | Verify pressure with a calibrated gauge, compare readings with the service specification, inspect for drift, and test components only with the load secured. | Adjust the relief valve only within approved limits, replace leaking seals or valves, and retest the system under controlled conditions. | High |
| The control buttons do not respond | Blown fuse, discharged battery, open safety interlock, faulty limit switch, damaged wiring, or failed solenoid coil. | Check the power supply, fuses, emergency stop, interlocks, limit switches, connectors, and solenoid voltage using appropriate electrical test equipment. | Restore power, replace correctly rated protective devices, repair wiring, adjust or replace the failed switch, and verify every safety interlock. | High |
| The lift is uneven or tilted | Unequal cylinder movement, obstructed guide rails, uneven loading, worn bushings, or different pressures in synchronized circuits. | Remove the load, inspect guides and structural members, verify platform alignment, check cylinder connections, and compare pressure or position feedback where provided. | Correct the load, clear obstructions, lubricate approved guide points, repair worn mechanical parts, and synchronize or service the hydraulic circuit. | High |
| Fluid appears milky, dark, or contains particles | Water contamination, oxidation, incorrect fluid, degraded additives, or wear debris from internal components. | Inspect a clean fluid sample, check the reservoir breather and seals, examine filters for metal particles, and review maintenance and contamination history. | Identify and remove the contamination source, flush the system when required, replace filters and fluid, and inspect pumps, valves, and cylinders for damage. | Medium |
| Repeated fuse or breaker trips | Motor overload, short circuit, seized pump, incorrect fuse rating, low voltage, or excessive hydraulic pressure. | Disconnect power safely, inspect wiring, measure supply voltage, check motor current, verify pump rotation, and test system pressure without bypassing protection. | Correct wiring or voltage problems, use the specified protective device, remove mechanical or hydraulic overload, and repair the motor or pump as needed. | High |
What Is Hydraulic Lift Failure and How to Troubleshoot It?
How to Prevent Future Hydraulic Lift Failures
Preventive maintenance begins with clean oil, stable pressure, and disciplined inspections. The National Fluid Power Association reports that contamination remains a leading cause of hydraulic component failure, often linked to 70–80% of breakdowns. That figure varies by application, but the warning is practical. Check oil samples, filter condition, moisture, and particle levels before performance declines. Use ISO 4406 cleanliness codes when recording laboratory results.
Small leaks matter.
Inspect cylinder rods for scratches, rust, and oil films. A damaged rod can destroy seals and reduce lifting capacity. Examine hoses for swelling, abrasion, and sharp bends. Replace questionable fittings instead of tightening them repeatedly. Tightening is not always repair.
Maintenance records should include operating pressure, oil temperature, filter changes, and unusual noises. The U.S. Occupational Safety and Health Administration requires energy isolation during servicing under 29 CFR 1910.147. Apply lockout procedures before opening hydraulic lines or entering danger zones. Never search for leaks with bare hands; pressurized fluid can penetrate skin. Use cardboard or approved detection equipment.
A qualified technician should test relief-valve settings and load-holding performance at scheduled intervals. The inspection interval must reflect duty cycles, dust, temperature, and load frequency. A lift used outdoors needs stricter checks than a lightly used indoor unit. We sometimes replace the pump too early. Trend data can reveal a clogged filter, worn seal, or contaminated oil first. That small diagnostic step can prevent a larger failure.
: Remove the load and lower the platform when possible. Isolate electrical and hydraulic energy. Use approved supports before entering danger zones. Never rely on the cylinder alone.
Common signs include slow rising, uneven movement, or sudden pressure loss. Record sounds, temperature, symptoms, and platform position. Small details can separate mechanical faults from hydraulic faults.
Check the reservoir level with clean equipment. Take a clean fluid sample for inspection. Milky fluid may contain water. Dark fluid or a burnt smell suggests overheating.
Inspect fittings, hoses, cylinder rods, and the floor beneath the lift. A dry floor proves very little. Wipe suspected areas clean. Cycle the lift with a safe, light load, then inspect again.
Low pressure may involve a worn pump, relief valve, blocked filter, or low power-unit speed. Compare gauge pressure with the specified range. Do not adjust the relief valve casually. That shortcut can create another fault.
Inspect the control valve and cylinder seals for internal leakage. Normal gauge pressure does not prove proper load holding. A qualified technician should perform calibrated leakage tests.
Air in the circuit can cause uneven or jerky motion. Loose suction clamps or restricted strainers may create cavitation. A sharp rattling pump noise deserves attention. Bleeding must follow the service manual.
Keep oil clean and monitor filters, moisture, particles, temperature, and operating pressure. Record unusual sounds and filter changes. Inspect rods for scratches, rust, and oil films. Replace damaged fittings instead of tightening them repeatedly.
Stop when heat rises quickly, a hose bulges, or a structural part bends. Pressurized leaks require safe detection methods, never bare hands. Use energy isolation before servicing. I have seen pumps replaced too early. Trend data might reveal a clogged filter or worn seal first.
Hydraulic lift failure occurs when a lift cannot raise, lower, or hold a load safely because of problems such as low fluid levels, leaks, trapped air, damaged seals, clogged filters, or worn mechanical components. Common warning signs include slow movement, uneven lifting, unusual noise, pressure loss, fluid leakage, and unexpected drifting. Recognizing these symptoms early can help reduce equipment damage and improve workplace safety.
To learn how to troubleshoot a hydraulic lift failure, begin by securing the lift, removing the load, and checking the fluid level, fluid condition, hoses, fittings, cylinders, valves, and filter. Inspect for visible leaks, loose connections, contamination, and air in the system. Depending on the cause, the solution may involve tightening fittings, replacing damaged seals or hoses, cleaning or replacing filters, bleeding trapped air, or correcting the fluid level. If the lift remains unstable or fails to operate after basic checks, qualified service personnel should inspect it. Regular maintenance, proper loading, clean hydraulic fluid, and scheduled inspections can help prevent future failures.

Keg Lift